By Mouhamadou Diaw
In a previous blog we described how to install dbvisit standby in a Linux box. In this article I am going to describe the installation on a Windows machine. We are using dbvisit 8 and windows server 2016. The name of my servers are winserver1 and winserver2.
The first thing you will have to do is to download dbvisit standby package here . A trial key will be sent to you. Before starting the installation we create a user named dbvisit (feel free to change) with following properties:
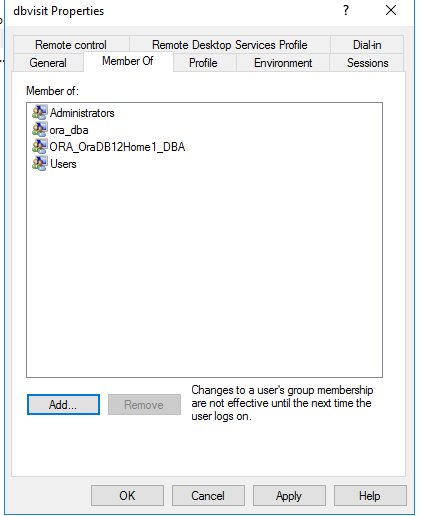
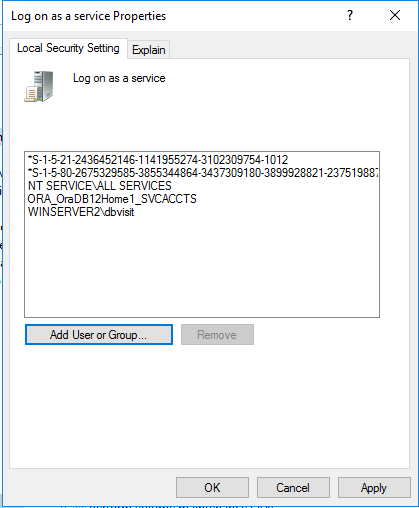
The user dbvisit need also privilege to logon as a service.
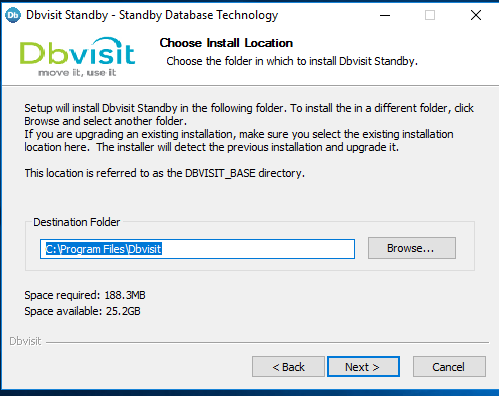
The installation is very easy, just log with a privileged user and run the executable. Below is the installation on the server winserver2. Note that dbvisit standby need to be installed on both servers. Note that we also have turned off the WIndows User Account Control (UAC).
Dbvnet,Dbvagent and Standby Cli components install

Click on Next
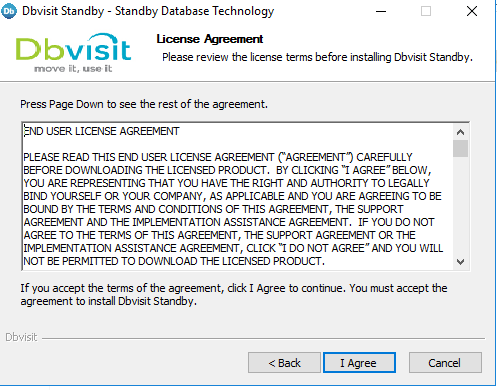
Click on I Agree (anyway we don’t have the choice)

Choose the components to install. Note that on a first time the central console is not installed. We will install it later. Note that it is recommended to install the console on a separate server (this can be a VM on Windows or Linux)
Click on Next
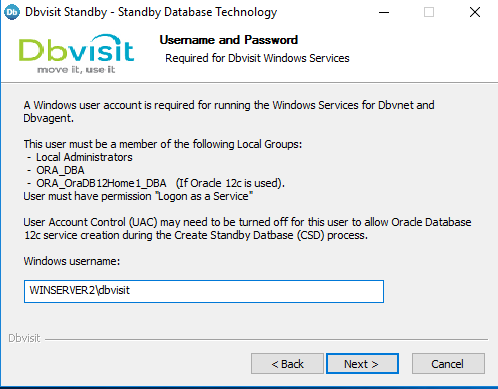
Here we give the user we created at the beginning
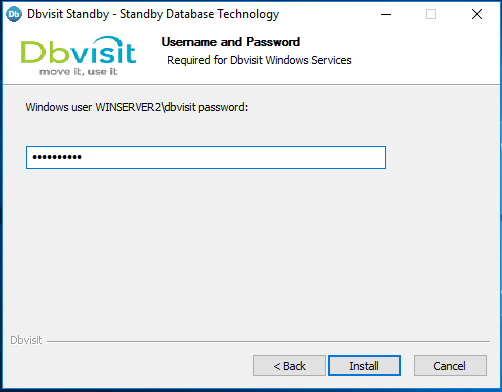
We provide the password
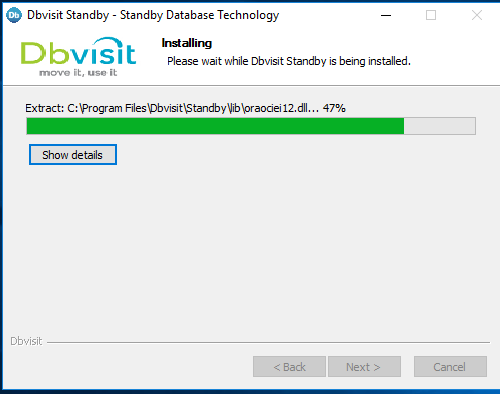
And then the installation starts
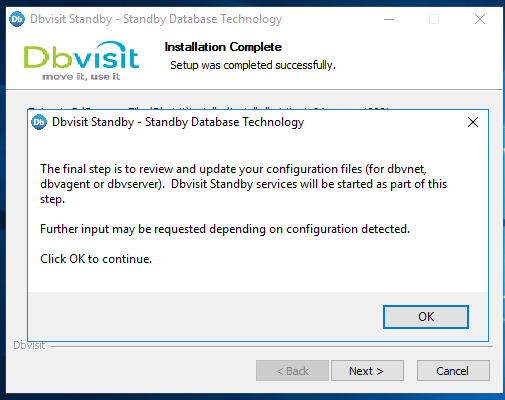
And then the final step is to answer to some configuration questions
-----------------------------------------------------------

About to configure DBVISIT DBVNET

-----------------------------------------------------------
>>> Please specify the Dbvnet Passphrase to be used for secure connections.
The passphrase provided must be the same in both the local and remote
Dbvnet installations. It is used to establish a secure (encrypted)
Dbvnet connections
Enter a custom value:
> XXXXXXXXXXXXXXXXX
>>> Please specify the Local host name to be used by Dbvnet on this server.
Dbvnet will be listening on the local IP Address on this server which
resolve to the host name specified here.
If using a cluster or virtual IP make sure the host name or alias
specified here resolve to the IP address local to where dbvnet is
installed. The host name should resolve to IPv4 address, if not
you can use an IPv4 IP address instead of host name.
Enter a custom value or press ENTER to accept default [winserver2]:
>
>>> Please specify the Local Dbvnet PORT to be used.
Dbvnet will be listening on the specified port for incoming connections
from remote dbvnet connections. Please make sure that this port is not
already in use or blocked by any firewall. You may choose any value
between 1024 and 65535, however the default of 7890 is recommended.
Enter a custom value or press ENTER to accept default [7890]:
>
>>> Please specify the Remote host name to be used by Dbvnet.
By default Dbvnet will use this remote hostname for any remote
connections. Dbvnet must be installed and configured on the specified
remote host. If using a cluster or virtual IP make sure the host name
or alias specified here resolve to the IP address local to where dbvnet
is installed.
If you are unsure about the remote host name during installation, use
the default value which will be the current local hostname.
The host name should resolve to IPv4 address, if not
you can use an IPv4 IP address instead of host name.
Enter a custom value or press ENTER to accept default [winserver2]:
> winserver1
>>> Please specify the Remote Dbvnet PORT to be used.
Dbvnet will connect to the remote server on this specified port.
On the remote host Dbvnet will be listening on the specified port for
incoming connections. Please make sure that this port is not already in
use or blocked by any firewall. You may choose any value between 1024
and 65535, however the default of 7890 is recommended.
Enter a custom value or press ENTER to accept default [7890]:
>
———————————————————–
Summary of the Dbvisit DBVNET configuration
———————————————————–
DBVISIT_BASE C:\Program Files\Dbvisit
DBVNET_PASSPHRASE XXXXXXXXXXXX
DBVNET_LOCAL_HOST winserver2
DBVNET_LOCAL_PORT 7890
DBVNET_REMOTE_HOST winserver1
DBVNET_REMOTE_PORT 7890
Press ENTER to continue
———————————————————–
About to configure DBVISIT DBVAGENT
———————————————————–
>>> Please specify the host name to be used for the Dbvisit Agent.
The Dbvisit Agent (Dbvagent) will be listening on this local address.
If you are using the Dbvserver (GUI) – connections from the GUI will be
established to the Dbvisit Agent. The Dbvisit Agent address must be
visible from the Dbvserver (GUI) installation.
If using a cluster or virtual IP make sure the host name or alias
specified here resolve to the IP address local to where dbvnet is
installed.
The host name should resolve to IPv4 address, if not you can use
an IPv4 IP address instead of host name.
Enter a custom value or press ENTER to accept default [winserver2]:
>
>>> Please specify the listening PORT number for Dbvagent.
The Dbvisit Agent (Dbvagent) will listening on the specified port for
incoming requests from the GUI (Dbvserver). Please make sure that this
port is not already in use or blocked by any firewall. You may choose
any value between 1024 and 65535, however the default of 7891 is
recommended.
Enter a custom value or press ENTER to accept default [7891]:
>
>>> Please specify passphrase for Dbvagent
Each Dbvisit Agent must have a passpharse specified. This passphrase
does not have to match between all the servers. It will be used to
establish a secure connection between the GUI (Dbvserver) and the
Dbvisit Agent.
Enter a custom value:
> XXXXXXXXXXXXXXXXXXXX
———————————————————–
Summary of the Dbvisit DBVAGENT configuration
———————————————————–
DBVISIT_BASE C:\Program Files\Dbvisit
DBVAGENT_LOCAL_HOST winserver2
DBVAGENT_LOCAL_PORT 7891
DBVAGENT_PASSPHRASE XXXXXXXXXXXXXXXXXXX
Press ENTER to continue
No need to configure standby, skipped.
Copied file C:\Program Files\Dbvisit\dbvnet\conf\dbvnetd.conf to C:\Program Files\Dbvisit\dbvnet\conf\dbvnetd.conf.201808260218
DBVNET config file updated
Copied file C:\Program Files\Dbvisit\dbvagent\conf\dbvagent.conf to C:\Program Files\Dbvisit\dbvagent\conf\dbvagent.conf.201808260218
DBVAGENT config file updated
———————————————————–
Component Installed Version
———————————————————–
standby 8.0.22_36_gb602000a
dbvnet 8.0.22_36_gb602000a
dbvagent 8.0.22_36_gb602000a
dbvserver not installed
———————————————————–
———————————————————–
About to start service DBVISIT DBVNET
———————————————————–
Successfully started service DBVISIT DBVNET
———————————————————–
About to start service DBVISIT DBVAGENT
———————————————————–
Successfully started service DBVISIT DBVAGENT
>>> Installation completed
Install log C:\Users\dbvisit\AppData\Local\Temp\dbvisit_install.log.201808260214.
Press ENTER to continue
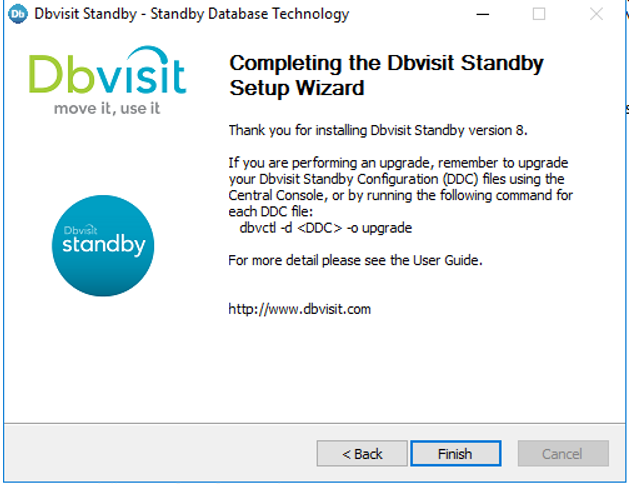
Once then we can finish the installation
dbserver console install
The installation of the dbserver (central console) is done is the same way. We will not show pictures but only the questions we have to reply. In our case it is installed on the primary server winserver1.
-----------------------------------------------------------

Welcome to the Dbvisit software installer.

-----------------------------------------------------------
Installing dbvserver…
———————————————————–
About to configure DBVISIT DBVSERVER
———————————————————–
>>> Please specify the host name to be used for Dbvserver
The Dbvisit Web Server (Dbvserver) will be listening on this local
address. If using a cluster or virtual IP make sure the host name or
alias specified here resolve to the IP address local to where Dbvserver
is installed.
If you are unsure about the remote host name during installation, use
the default value which will be the current local hostname.
The host name should resolve to IPv4 address, if not you can use
an IPv4 IP address instead of host name.
Enter a custom value or press ENTER to accept default [winserver1]:
>
>>> Please specify the listening port number for Dbvserver on the local server
You may choose any value between 1024 and 65535. The default recommended
value is 4433.
Note: if you can not access this port after the installation has
finished, then please double-check your server firewall settings
to ensure the selected port is open.
Enter a custom value or press ENTER to accept default [4433]:
>
>>> Please specify the host name (or IPv4 address) to be used for Dbvserver public interface
In most cases this will be the same as the listener address, if not sure
use the same value as the listener address.
The Dbvisit Web Server (Dbvserver) will be listening on the local
listener address. The public address can be set to an external IP
example a firewall address in case the Central Console (Dbvserver)
and agents (Primary and Standby Database servers) have a firewall
inbetween them. The public interface address will be passed to
the agents during communication for sending information back.
If you are unsure about the public host address, use
the default value which will be the current local hostname.
The host name should resolve to IPv4 address, if not you can use
an IPv4 IP address instead of host name.
Enter a custom value or press ENTER to accept default [winserver1]:
>
———————————————————–
Summary of the Dbvisit DBVSERVER configuration
———————————————————–
DBVISIT_BASE C:\Program Files\Dbvisit
DBVSERVER_LOCAL_HOST winserver1
DBVSERVER_LOCAL_PORT 4433
DBVSERVER_PUBLIC_HOST winserver1
Press ENTER to continue
———————————————————–
Summary of the Dbvisit DBVSERVER configuration
———————————————————–
DBVISIT_BASE C:\Program Files\Dbvisit
DBVSERVER_LOCAL_HOST winserver1
DBVSERVER_LOCAL_PORT 4433
DBVSERVER_PUBLIC_HOST winserver1
Press ENTER to continue
Once the console installed we can log into using the following URL
https://winserver1:4433
with the default credentials admin/admin (Note that you have to change it once logged)
Conclusion : In this blog we have shown how to install dbvisit in a Windows server. In a coming blog we will see how to create a standby database on a Windows server and how to schedule log shipping and log apply.
![Thumbnail [60x60]](https://www.dbi-services.com/blog/wp-content/uploads/2022/12/oracle-square.png)
![Thumbnail [90x90]](https://www.dbi-services.com/blog/wp-content/uploads/2022/08/DWE_web-min-scaled.jpg)