By Franck Pachot
.
The Oracle Database is fully supported on Docker according that Linux is Red Hat Enterprise Linux 7 or Oracle Enterprise Linux 7 with Unbreakable Enterprise 4. This is documented in MOS Note 2216342.1. Given the size of the Oracle database in GigaBytes even empty, the way it is installed at build with many file updates, and the per-block modifications of the datafiles, a block level copy-on-write filesystem is a must and deduplication and compression are appreciated. This makes ZFS a good option for the Docker storage driver, but also the external volumes. By the way, the Docker documentation about the storage drivers mention that zfs is a good choice for high-density workloads such as PaaS and this of course includes Database as a Service.
I’ve run this example on OEL 7.2 created in the the Oracle Cloud:
kernel-uek-devel
We need to install the kernel headers. Of course, it is probably better to run a ‘yum update’ and reboot in order to run the latest kernel.
Here, I’m just installing the headers for the current kernel:
[root@localhost opc]# yum -y install kernel-uek-devel-$(uname -r)
...
Installed:
  kernel-uek-devel.x86_64 0:4.1.12-112.14.13.el7uek
Dependency Installed:
  cpp.x86_64 0:4.8.5-28.0.1.el7_5.1    gcc.x86_64 0:4.8.5-28.0.1.el7_5.1           glibc-devel.x86_64 0:2.17-222.el7
  glibc-headers.x86_64 0:2.17-222.el7  kernel-headers.x86_64 0:3.10.0-862.9.1.el7  libdtrace-ctf.x86_64 0:0.8.0-1.el7
  libmpc.x86_64 0:1.0.1-3.el7          mpfr.x86_64 0:3.1.1-4.el7
Dependency Updated:
  glibc.x86_64 0:2.17-222.el7             glibc-common.x86_64 0:2.17-222.el7   libgcc.x86_64 0:4.8.5-28.0.1.el7_5.1
  libgomp.x86_64 0:4.8.5-28.0.1.el7_5.1
DKMS
We need Dynamic Kernel Module Support to load ZFS modules. I had problems in the past with this so I install it step by step to verify that everything is ok. First, enable the EPEL repository:
[root@localhost opc]# yum install -y yum-utils
[root@localhost opc]# yum-config-manager --enable ol7_developer_EPEL
Then install DKMS:
[root@localhost opc]# yum -y install -y dkms
...
Installed:
  dkms.noarch 0:2.4.0-1.20170926git959bd74.el7
Dependency Installed:
  elfutils-default-yama-scope.noarch 0:0.170-4.el7             elfutils-libelf-devel.x86_64 0:0.170-4.el7
  kernel-debug-devel.x86_64 0:3.10.0-862.9.1.el7               zlib-devel.x86_64 0:1.2.7-17.el7
Dependency Updated:
  elfutils-libelf.x86_64 0:0.170-4.el7       elfutils-libs.x86_64 0:0.170-4.el7       zlib.x86_64 0:1.2.7-17.el7
Install ZFS repository
There is a zfs-release package that installs the /etc/yum.repos.d/zfs.repo:
[root@localhost opc]# sudo rpm -Uvh http://download.zfsonlinux.org/epel/zfs-release.el7_4.noarch.rpm
Retrieving http://download.zfsonlinux.org/epel/zfs-release.el7_4.noarch.rpm
warning: /var/tmp/rpm-tmp.yvRURo: Header V4 RSA/SHA256 Signature, key ID f14ab620: NOKEY
Preparing...                          ################################# [100%]
Updating / installing...
   1:zfs-release-1-5.el7_4            ################################# [100%]
Basically, all it contains is the following enabled section:
[zfs]
name=ZFS on Linux for EL7 - dkms
baseurl=http://download.zfsonlinux.org/epel/7.4/$basearch/
enabled=1
metadata_expire=7d
gpgcheck=1
gpgkey=file:///etc/pki/rpm-gpg/RPM-GPG-KEY-zfsonlinux
Install ZFS
This is the important part, installing ZFS:
[root@localhost opc]# sudo yum install -y zfs
...
======================================================================================================================
 Package                    Arch              Version                                     Repository             Size
======================================================================================================================
Installing:
 zfs                        x86_64            0.7.9-1.el7_4                               zfs                   413 k
Installing for dependencies:
 kernel-devel               x86_64            3.10.0-862.9.1.el7                          ol7_latest             16 M
 libnvpair1                 x86_64            0.7.9-1.el7_4                               zfs                    30 k
 libuutil1                  x86_64            0.7.9-1.el7_4                               zfs                    35 k
 libzfs2                    x86_64            0.7.9-1.el7_4                               zfs                   130 k
 libzpool2                  x86_64            0.7.9-1.el7_4                               zfs                   591 k
 lm_sensors-libs            x86_64            3.4.0-4.20160601gitf9185e5.el7              ol7_latest             41 k
 spl                        x86_64            0.7.9-1.el7_4                               zfs                    29 k
 spl-dkms                   noarch            0.7.9-1.el7_4                               zfs                   456 k
 sysstat                    x86_64            10.1.5-13.el7                               ol7_latest            310 k
 zfs-dkms                   noarch            0.7.9-1.el7_4                               zfs                   4.9 M
The most important is to check that the zfs module is installed correctly:
zfs.ko:
Running module version sanity check.
 - Original module
   - No original module exists within this kernel
 - Installation
   - Installing to /lib/modules/4.1.12-112.14.13.el7uek.x86_64/extra/
I’ve seen cases where it was not and then the module cannot load. You can also check:
[root@localhost opc]# dkms status
spl, 0.7.9, 4.1.12-112.14.13.el7uek.x86_64, x86_64: installed
zfs, 0.7.9, 4.1.12-112.14.13.el7uek.x86_64, x86_64: installed
If you have a problem (such as “modprobe: FATAL: Module zfs not found” when loading the module), check the status and maybe re-install it with:
dkms remove zfs/0.7.9 --all
dkms --force install zfs/0.7.9
If everything is ok, you can load the module:
[root@localhost opc]# /sbin/modprobe zfs
[root@localhost opc]#
Create a ZFS filesystem
If the ZFS module was not loaded you have this error:
[root@localhost opc]# zpool list
The ZFS modules are not loaded.
Try running '/sbin/modprobe zfs' as root to load them.
If it has been loaded correctly, you have no ZFS Storage Pool yet:
[root@localhost opc]# zpool list
no pools available
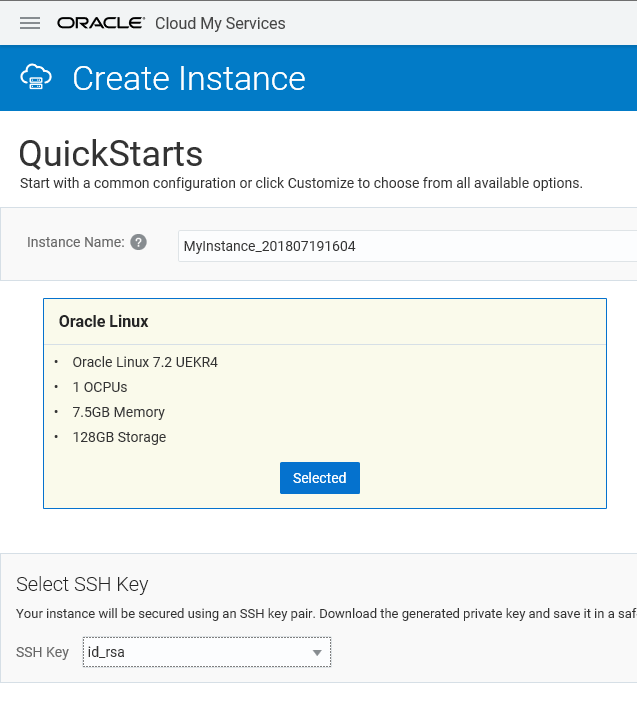
First I need to add a disk to my machine. Here I have only one disk created when I created the Compute Service:
[root@localhost opc]# lsblk
NAME                MAJ:MIN RM   SIZE RO TYPE MOUNTPOINT
xvdb                202:16   0   128G  0 disk
├─xvdb1             202:17   0   500M  0 part /boot
└─xvdb2             202:18   0 127.5G  0 part
  ├─vg_main-lv_root 249:0    0 123.5G  0 lvm  /
  └─vg_main-lv_swap 249:1    0     4G  0 lvm  [SWAP]
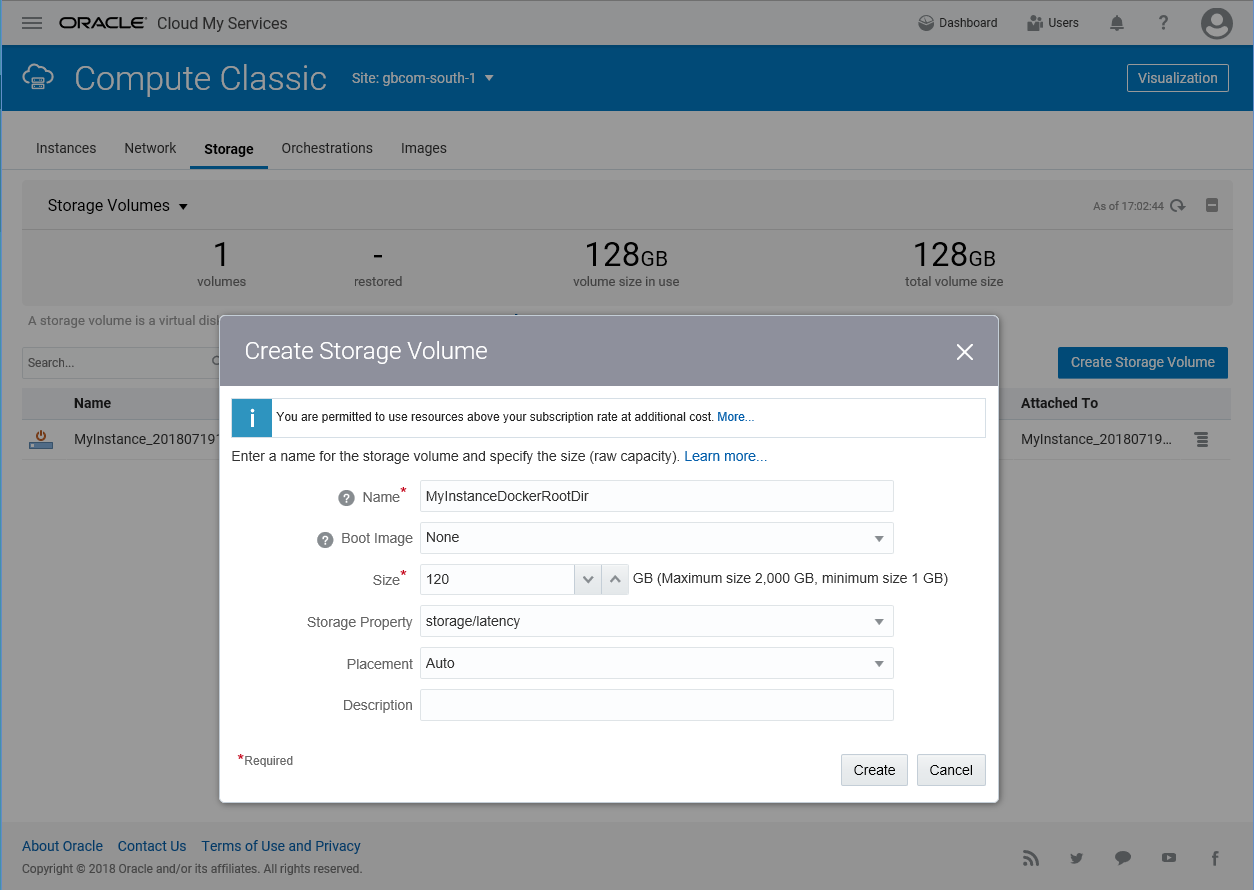
I add a new disk in the Storage tab:
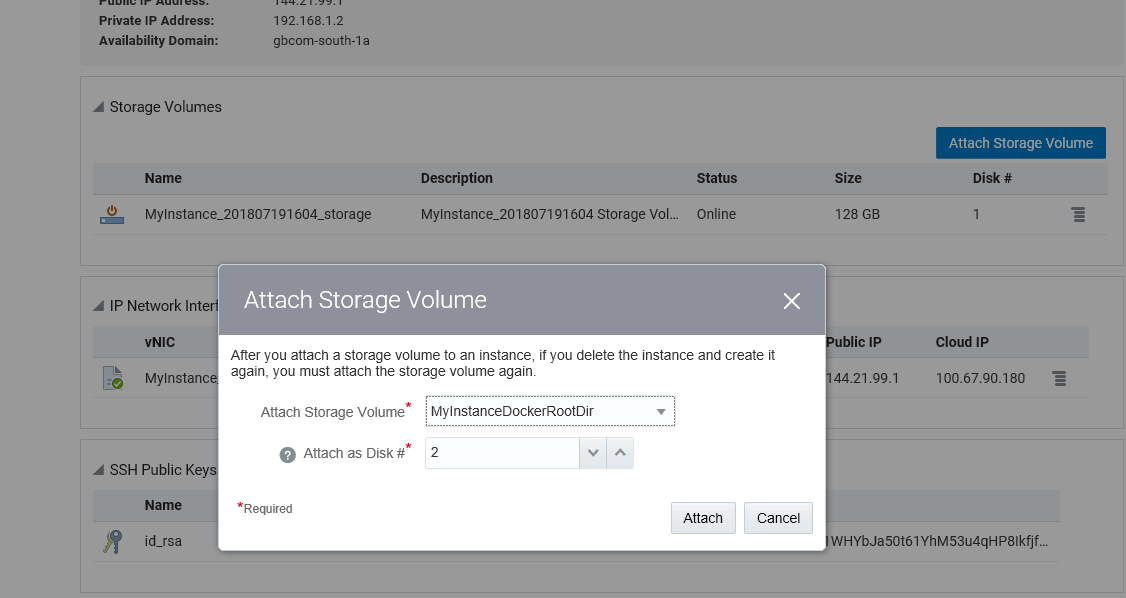
And attach it and attach it to my Cloud Instance:
Here is the new disk visible from the system:
[root@localhost opc]# lsblk
NAME MAJ:MIN RM SIZE RO TYPE MOUNTPOINT
xvdb 202:16 0 128G 0 disk
├─xvdb1 202:17 0 500M 0 part /boot
└─xvdb2 202:18 0 127.5G 0 part
├─vg_main-lv_root 249:0 0 123.5G 0 lvm /
└─vg_main-lv_swap 249:1 0 4G 0 lvm [SWAP]
xvdc 202:32 0 120G 0 disk
 
[root@localhost opc]# ls -l /dev/xvdc /dev/block/202:32
lrwxrwxrwx 1 root root 7 Jul 19 15:05 /dev/block/202:32 -> ../xvdc
brw-rw---- 1 root disk 202, 32 Jul 19 15:05 /dev/xvdc
Here is where I add a ZFS Storage Pool for Docker:
[root@localhost opc]# zpool create -f zpool-docker -m /var/lib/docker /dev/xvdc

[root@localhost opc]# zpool status
  pool: zpool-docker
 state: ONLINE
  scan: none requested
config:

        NAME          STATE     READ WRITE CKSUM
        zpool-docker  ONLINE       0     0     0
          xvdc        ONLINE       0     0     0

[root@localhost opc]# zpool list
NAME           SIZE  ALLOC   FREE  EXPANDSZ   FRAG    CAP  DEDUP  HEALTH  ALTROOT
zpool-docker   119G   118K   119G         -     0%     0%  1.00x  ONLINE  -
And while I’m there I set some attributes to enable compression and deduplication. And as Docker writes to layers with 32k I/O I set the recordsize accordingly:
zfs set compression=on zpool-docker
zfs set dedup=on zpool-docker
zfs set recordsize=32k zpool-docker
Note that I attached if you reboot the instance you will have to attach the storage again and then run zpool import zpool-docker)
[root@localhost opc]# zpool import zpool-docker
Just to test that everything is ok, I install Docker as I did in a previous post:
[root@localhost opc]# yum-config-manager --add-repo https://download.docker.com/linux/centos/docker-ce.repo
[root@localhost opc]# yum-config-manager --enable ol7_addons
[root@localhost opc]# yum -y install docker-ce
[root@localhost opc]# systemctl start docker
Docker layers
I pull a small image and start a container on it:
[root@localhost opc]# docker run oraclelinux:7-slim
Here is the image and the ZFS dataset for its layer, mounted under /var/lib/docker/zfs:
[root@localhost opc]# docker image ls
REPOSITORY          TAG                 IMAGE ID            CREATED             SIZE
oraclelinux         7-slim              b1af4ba0cf19        12 days ago         117MB

[root@localhost opc]# docker inspect oraclelinux:7-slim | jq -r .[0].GraphDriver

{
  "Data": {
    "Dataset": "zpool-docker/fe31ff466872588506b1a3a3575c64d458beeb94d15bea593e5048237abf4fcc",
    "Mountpoint": "/var/lib/docker/zfs/graph/fe31ff466872588506b1a3a3575c64d458beeb94d15bea593e5048237abf4fcc"
  },
  "Name": "zfs"
}
And here is the container layer:
[root@localhost opc]# docker container ls -a

CONTAINER ID        IMAGE                COMMAND             CREATED             STATUS                     PORTS               NAMES
9eb7610c1fc5        oraclelinux:7-slim   "/bin/bash"         6 minutes ago       Exited (0) 6 minutes ago                       inspiring_shannon

[root@localhost opc]# docker inspect inspiring_shannon | jq -r .[0].GraphDriver

{
  "Data": {
    "Dataset": "zpool-docker/5d1022761b6dee28a25e21ec8c5c73d99d09863f11439bbf86e742856f844982",
    "Mountpoint": "/var/lib/docker/zfs/graph/5d1022761b6dee28a25e21ec8c5c73d99d09863f11439bbf86e742856f844982"
  },
  "Name": "zfs"
}
If you don’t have jq just ‘yum install jq’. It is very convenient to filter and display the ‘inspect’ output.
We can see those datasets from ZFS list:
[root@localhost opc]# zfs list -o creation,space,snapshot_count,written -r | sort

CREATION               NAME                                                                                AVAIL   USED  USEDSNAP  USEDDS  USEDREFRESERV  USEDCHILD  SSCOUNT  WRITTEN
Thu Jul 19 15:13 2018  zpool-docker                                                                         115G   126M        0B    964K             0B       125M     none     964K
Thu Jul 19 15:38 2018  zpool-docker/fe31ff466872588506b1a3a3575c64d458beeb94d15bea593e5048237abf4fcc        115G   125M        0B    125M             0B         0B     none        0
Thu Jul 19 15:39 2018  zpool-docker/5d1022761b6dee28a25e21ec8c5c73d99d09863f11439bbf86e742856f844982        115G    87K        0B     87K             0B         0B     none      87K
Thu Jul 19 15:39 2018  zpool-docker/5d1022761b6dee28a25e21ec8c5c73d99d09863f11439bbf86e742856f844982-init   115G    46K        0B     46K             0B         0B     none        0
Here, sorted by creation time, we see the datasets used by each layer. The initial files before having any image are less than 1MB. The image uses 125MB. The container creation has written 87KB and 46KB additional once running.
![Thumbnail [60x60]](https://www.dbi-services.com/blog/wp-content/uploads/2022/12/oracle-square.png)
![Thumbnail [90x90]](https://www.dbi-services.com/blog/wp-content/uploads/2022/08/DWE_web-min-scaled.jpg)