
SQL Server 2016 CTP 2 has introduced some interesting new features such as Always Encrypted, Stretch database, the configuration of the tempdb in the SQL Server installation, aso…
Regarding the configuration of the tempdb in SQL Server 2016 CTP 2, I recommend you a good article called SQL Server 2016 CTP2 : first thoughts about tempdb database from David Barbarin.
In this article, I will focus on the Stretch database feature!
What is the Stretch Database feature?
This new feature allows to extend on-premise databases to Microsoft Azure. In other words, you can use the Microsoft cloud as an additional storage for your infrastructure.
This can be useful if you have some issues with your local storage, such as available space.
Prerequisites
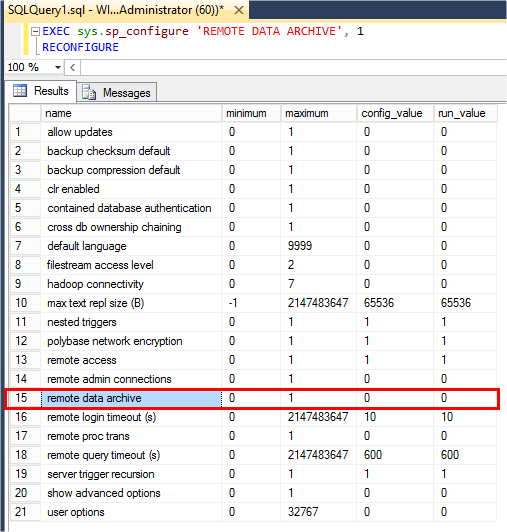
First, you need to enable the option on the server by running the stored procedure named ‘sp_configure’. It requires at least serveradmin or sysadmin permissions.
Of course, you also need a valid Microsoft Azure subscription and your credentials. Be careful, a SQL Database server and an Azure storage will be used for this new feature.
Enable Stretch for a database
After enabling this feature at the server level, you need to enable it for the desired database.
It requires at least db_owner and CONTROL DATABASE permissions.
By default, it will create a SQL Database server with the Standard service tier and the S3 performance level. To fit your needs, you can change the level of the service afterwards.
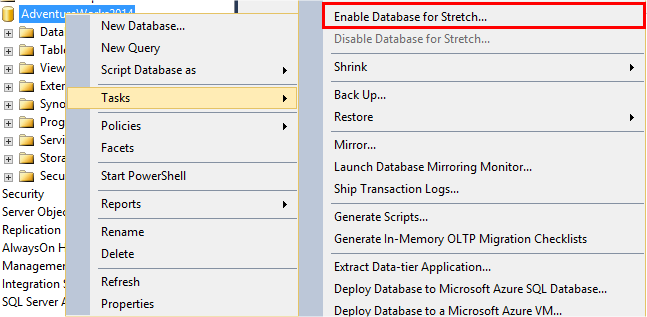
Everything is done using a wizard in Management Studio. To open the wizard, proceed as follows:
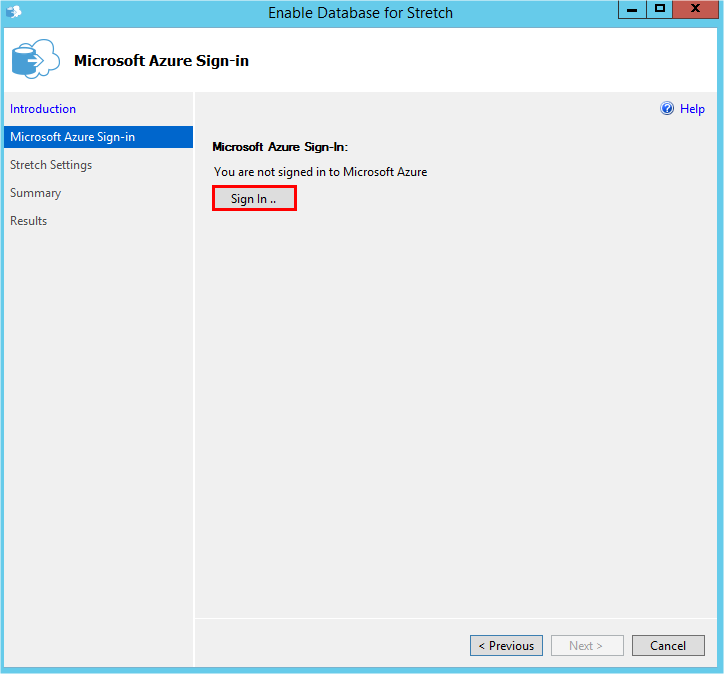
Skip the ‘Introduction’ step to access to the ‘Microsoft Sign-In’ step:
You need your Microsoft Azure credentials to access to your subscription. Once this is done, you can click on ‘next’.
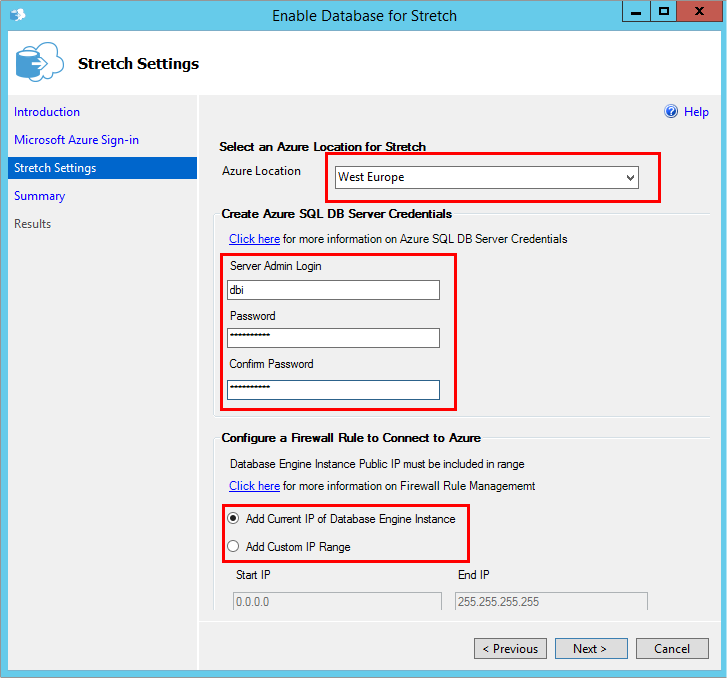
You have to select an Azure location. Of course for better performances, you should select the closest location to your on-premise server.
You also need to provide credentials for the Azure SQL DB server which will be created through your wizard.
The last step is to configure the SQL Databases firewall in Azure to allow connection from your on-premise server. To do this, you must specify a custom IP range or use the current IP of your instance.
Then, click the ‘next’ button. A summary of all your configuration is displayed. Click the ‘next’ button again.
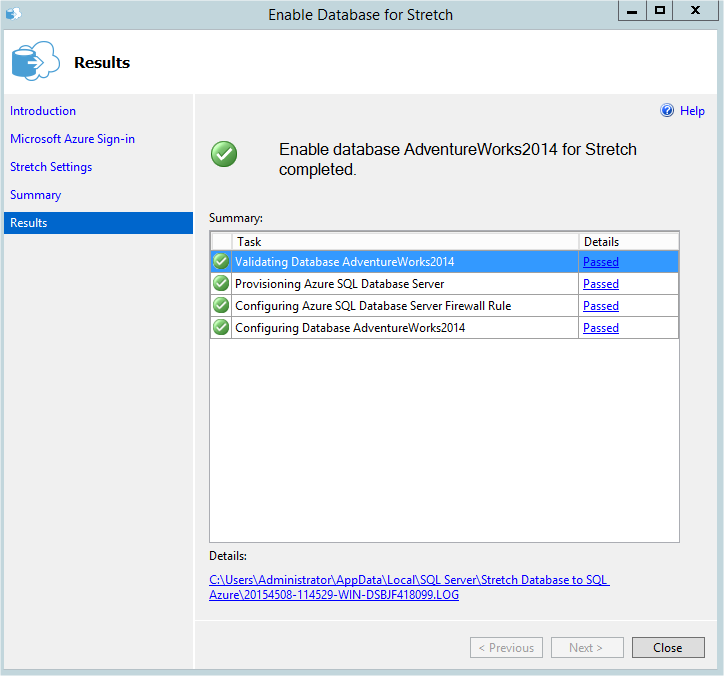
The configuration is now completed! The feature is enabled for your database.
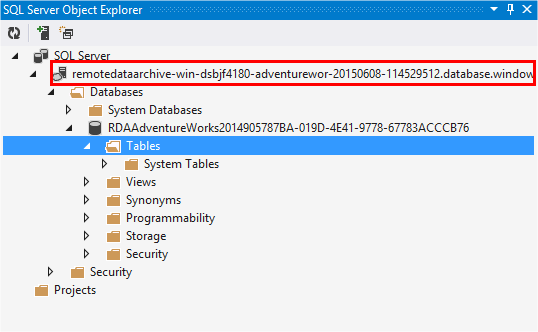
With Visual Studio, you can connect to the SQL Database server which is in Azure. You can see the SQL Database server recently created:
At the moment, there is no table stored in Azure, because we do not have enabled the feature for a table. In my next blog, I will show you how to do this!

![Thumbnail [60x60]](https://www.dbi-services.com/blog/wp-content/uploads/2022/08/NAC_web-min-scaled.jpg)
![Thumbnail [90x90]](https://www.dbi-services.com/blog/wp-content/uploads/2022/08/DWE_web-min-scaled.jpg)