Beginning of last week Microsoft announced the general availability of SQL Server 2017 for today, the second of October. In the same time, but in a more marketing side, Microsoft announced a SQL Server on Red Hat Enterprise Linux offer, more information here.
It looked for me like the good time to do my first installation of SQL Server 2017 on Linux.
My first concern was to download an ISO of the Red Hat Enterprise Linux. I found it here and mapped it in my new Hyper-V Virtual Machine. I created my Virtual machine with small settings: just one vCPU, 4GB RAM and 50GB disk.
To be honest for a Windows guy, having to work in a Linux environment is a little bit stressful…
The first step has been to install my Linux.
I did it with the minimal possible configurations and let the installation configured automatically the needed mount points.
Once the installation finished, the tricky part for me has been to configure my two network cards: one for internal purpose in order to interconnect with my others VMs and a second one to connect to the Internet… what a challenge… after some requests to my Oracle colleagues and some tests I finally managed to set my two cards 😉
I started the installation with the YUM Red Hat package manager following the Microsoft documentation.
First error: my Red Hat Enterprise Linux system is not registered… In order to register and automatically subscribe I ran this command with the userid and password I used to create an account before downloading the REHL iso:
# subscription-manager register --username <username> --password <password> --auto-attach
After this registration, the first step was to download the Microsoft SQL Server Red Hat referential file into the /etc/yum.repos.d folder and to run a YUM Update to install the last available updates… more than 240 for me…
Once done I was able to execute the following script to download and install the SQL Server packages:
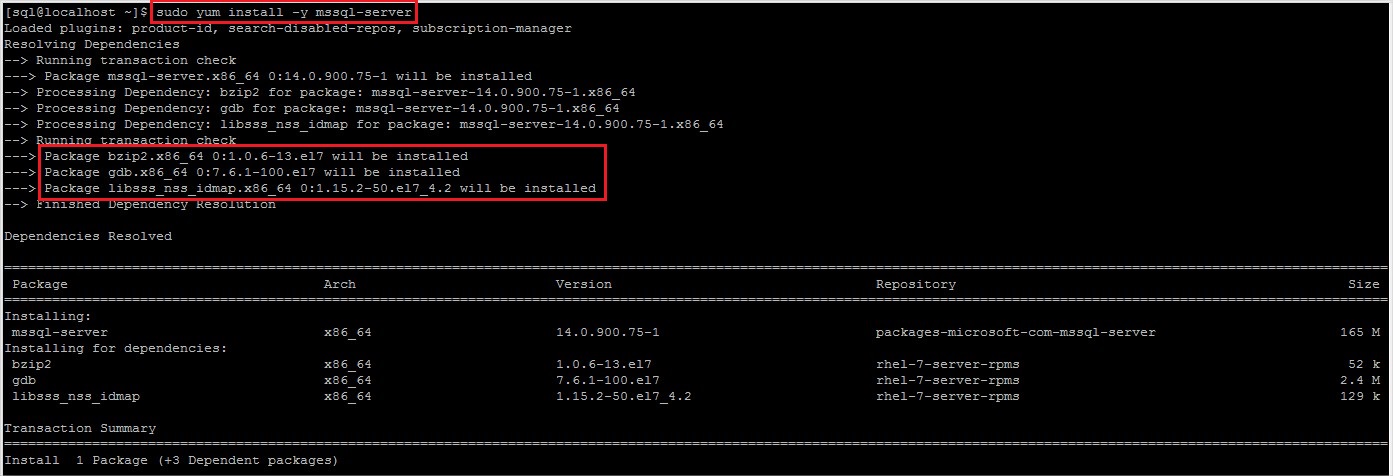
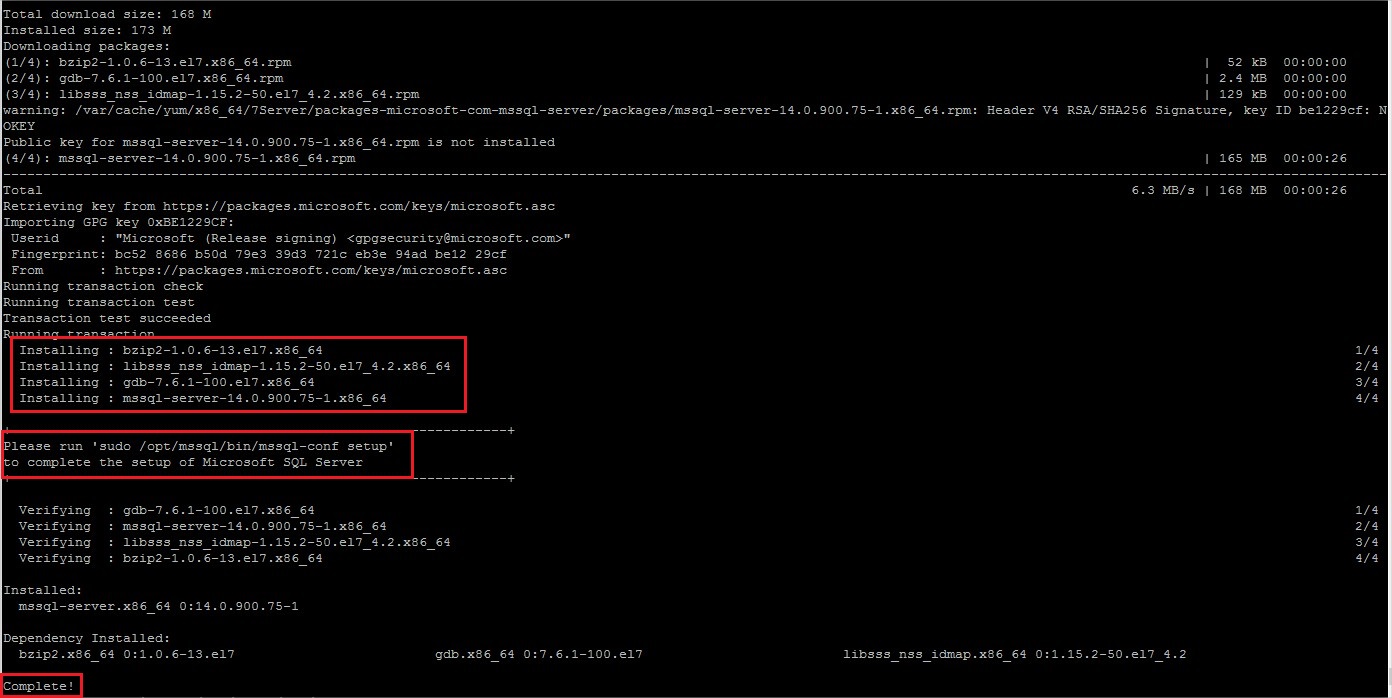
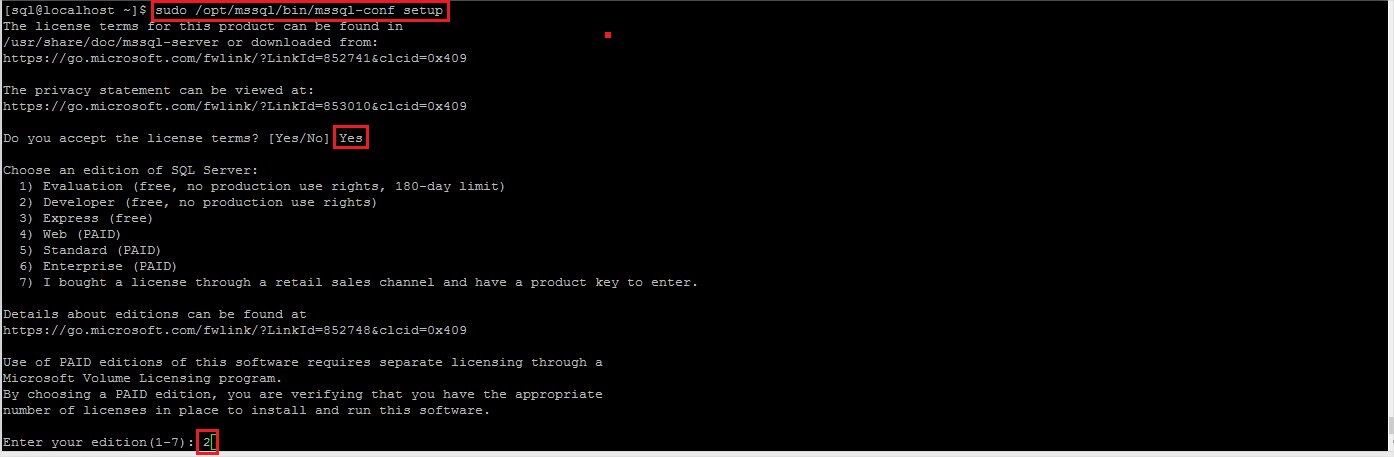
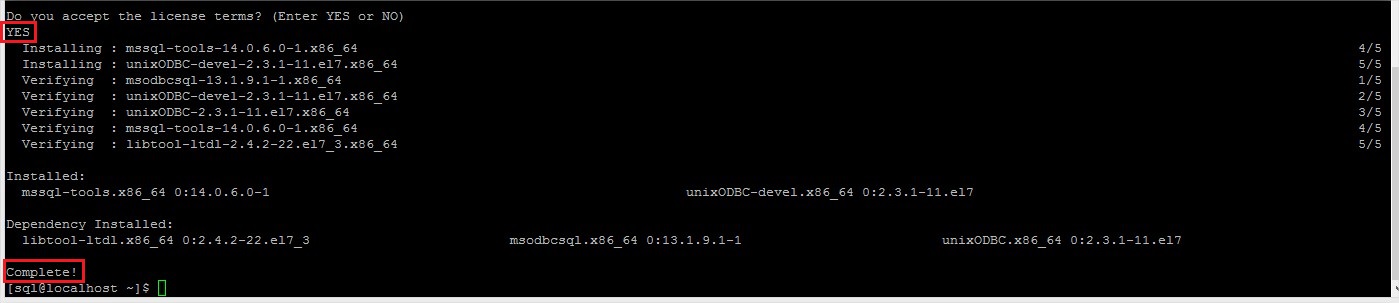
During the installation of the packages I have been asked to run the SQL Server configuration setup to finalyze the setup of my SQL Server, I did it and needed to accept the license agreement, to choose an edition and to give a password to the SA login:
![]()
It’s already done!
My SQL Server instance is installed and processes are running:
![]()
![]()
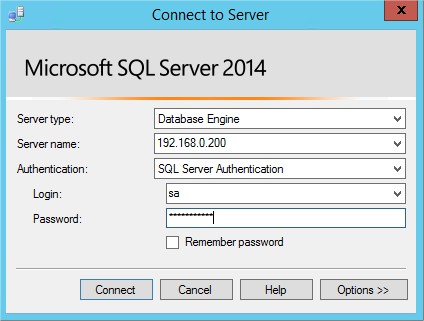
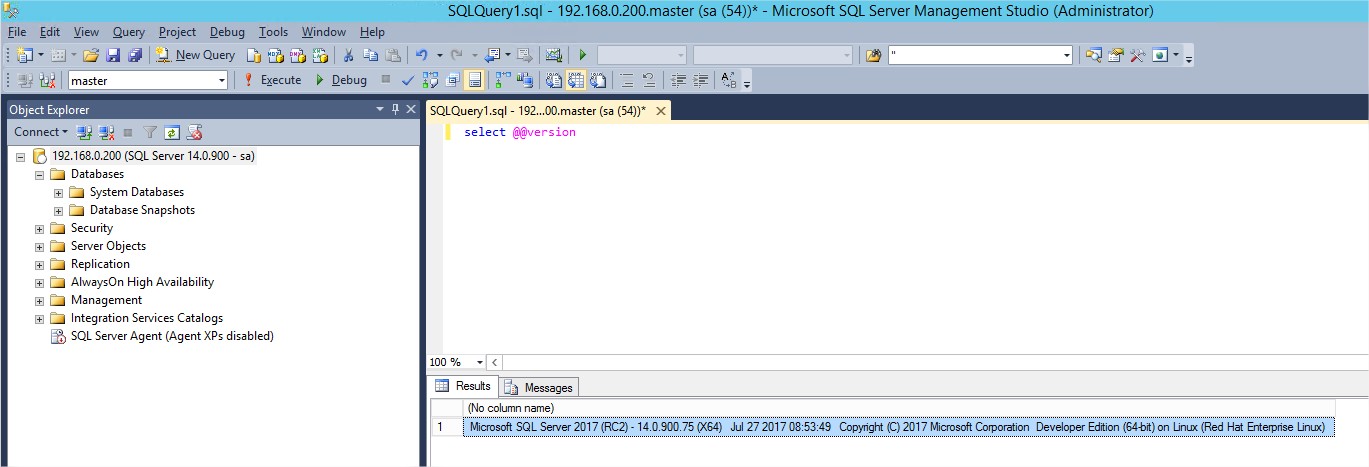
At this point it was already possible to connect to my instance via Management Studio installed in another Virtual Machine. I used the Ip address of my Virtual Machine (“ip a” to have it on Linux) and my System Administrator user and password, the port is the default one 1433:
To be able to query my instance directly from my Linux machine, I installed the SQL Server tools by downloading as before the Microsoft Red Hat repository configuration file (1 in the below picture) and after installed the tools with the packages previously downloaded (2 in my picture):
![]()
I was able after this installation to directly query my instance from my Linux with the following command:

This first step with Microsoft SQL Server 2017 on Red Hat Enterprise Linux was a good experience and also a good way to remember some Linux commands which I didn’t use for a while…
Before to conclude, a small tips if you want to change the port of your SQL Server instance.
As you know by default SQL Server will run under port 1433. To change it on SQL Server 2017, I used the file mssql-conf which is a configuration script installed with this new version of SQL Server. This script is used to set some parameters like default directories, collation, trace flags…
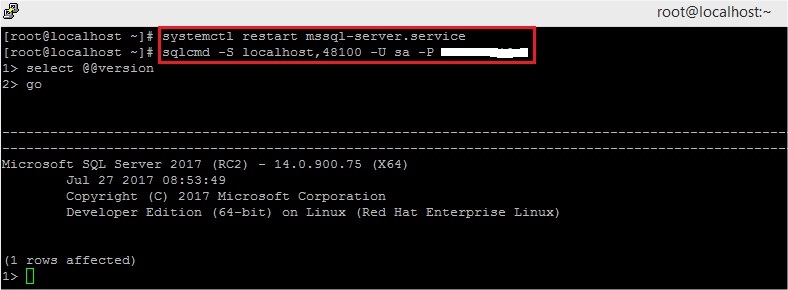
Here I setted the port to 48100:
![]()
I needed to restart my SQL Server service and after I could run a sqlcmd command with my new port:
That’s all Folks!
It was quite funny to play around with command lines as I learnt during my studies many years ago 😉
![Thumbnail [60x60]](https://www.dbi-services.com/blog/wp-content/uploads/2022/10/STS_web-min-scaled.jpg)
![Thumbnail [90x90]](https://www.dbi-services.com/blog/wp-content/uploads/2022/08/DWE_web-min-scaled.jpg)