I made a mistake recently when adding a new node to an existing Windows Failover Cluster supporting AlwaysOn SQL Server instances.
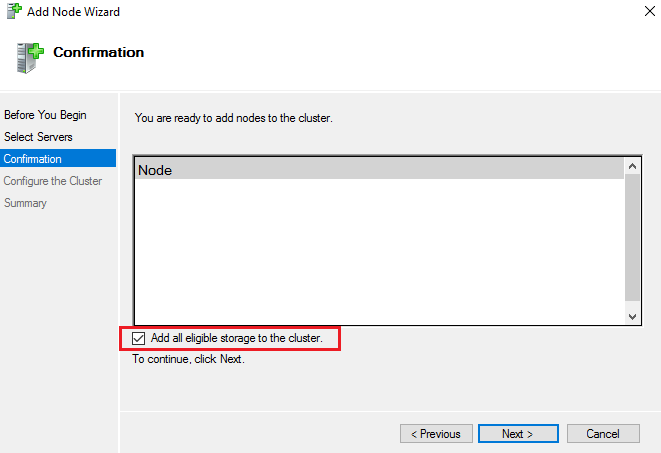
When adding a new node using the GUI there’s this option checked by default named “Add all eligible storage to the cluster”.
Before performing the operation the disks on the 2 nodes of my cluster were used by the SQL Server instances.
Because I’m using the AlwaysOn features the disks are local on each node. They are not clustered.
This option doesn’t seem to perform any check about the disks state. It will take offline all the disks on all the cluster nodes and try to add them to the cluster.
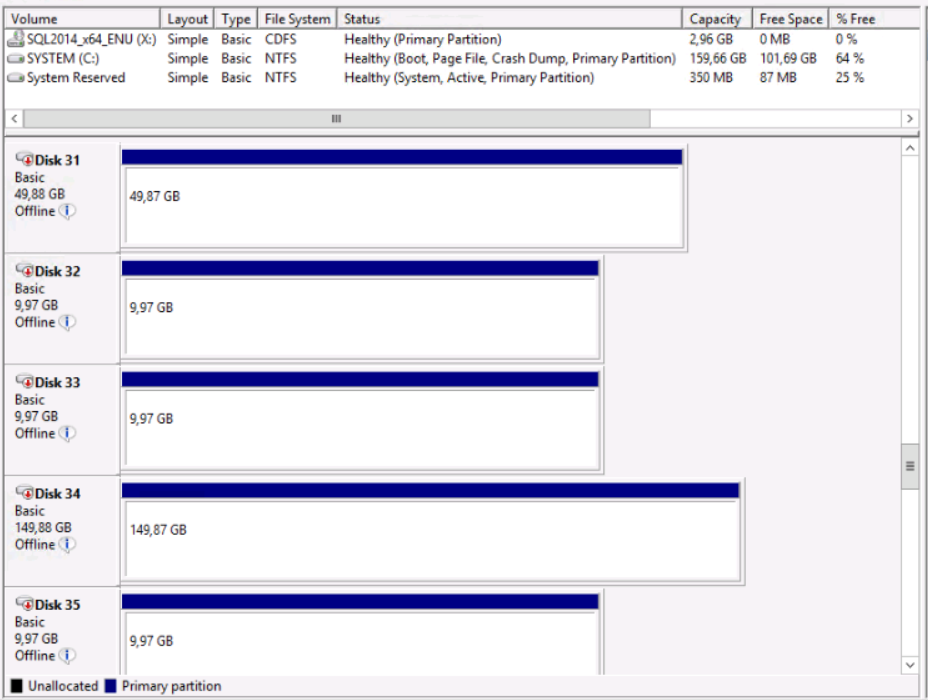
So after clicking “Finish” on the Wizard, all the disks on my 2 existing nodes where OFFLINE.
All my AlwaysOn instances were down.
If you are in the same situation you will find below the steps I went through to fix fix my AlwaysOn instances.
First, I removed all the disks from the cluster. As you can see all the disks are visible as “Cluster Shared Volume”. In my case, they were Offline, not Online as shown in this screenshot.
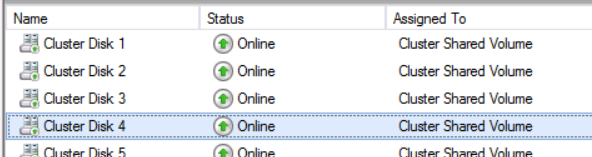
I did this first step manually in the Failover Cluster Manager interface but it could be done faster using the Remove-ClusterSharedVolume command.
Secondly, I put all the disks back Online. I had dozens of disks. Instead of doing it manually here is the Powershell script that can save a lot of time.
With Get-Disk we can list the Offline disks.
PS C:\> Get-Disk | Where-Object IsOffline -Eq $True

Number Friendly Name                            OperationalStatus
------ -------------                            -----------------
1      VMware Virtual disk SCSI Disk Device     Offline
2      VMware Virtual disk SCSI Disk Device     Offline
3      VMware Virtual disk SCSI Disk Device     Offline
4      VMware Virtual disk SCSI Disk Device     Offline
5      VMware Virtual disk SCSI Disk Device     Offline
Piping this into Set-Disk will do the Job for all disks in one command.
PS C:\> Get-Disk | Where-Object IsOffline -Eq $True | Set-Disk -IsOffline $False
Now the disks are online and you should be able to start your SQL Server instances.
My instances did not start at all even with the disks back online.
Looking at the error log I could see an issue with the master database.
The operating system returned error 21(The device is not ready.) to SQL Server
during a read at offset 0x0000000004a000 in file 'C:\mountpoints\**\master.mdf'.
Additional messages in the SQL Server error log and system event log may provide more detail.
This is a severe system-level error condition that threatens database integrity and must be corrected immediately.
Complete a full database consistency check (DBCC CHECKDB).
Looking at the folder permissions everything seemed to be good. The issue was at the disk level.
When turned back online the disks were in a Read-only state. This setting was probably set when the cluster tried to add the disks to its available storage.
Again, here is the Powershell script that will remove the Read-only flag on all disks instead of doing it one by one with Diskpart.
PS C:\> Get-Disk | Where-Object IsReadonly -Eq $True

Number Friendly Name                            OperationalStatus
------ -------------                            -----------------
1      VMware Virtual disk SCSI Disk Device     Online
2      VMware Virtual disk SCSI Disk Device     Online
3      VMware Virtual disk SCSI Disk Device     Online

PS C:\> Get-Disk | Where-Object IsReadonly -Eq $True | Set-Disk -IsReadonly $False
After this last command, I managed to start again all the SQL Server instances on all nodes.
I would recommend to always uncheck this option when adding a node to a Cluster whether it hosts FCI or AlwaysOn instances. I don’t know why Microsoft still have this option checked by default when there is no shared storage.
If you just did the mistake I hope these PowerShell lines will save you some time fixing your servers.
![Thumbnail [60x60]](https://www.dbi-services.com/blog/wp-content/uploads/2022/09/SNA_web-min-scaled.jpg)
![Thumbnail [90x90]](https://www.dbi-services.com/blog/wp-content/uploads/2022/08/DWE_web-min-scaled.jpg)
![Thumbnail [90x90]](https://www.dbi-services.com/blog/wp-content/uploads/2024/03/AHI_web.jpg)
![Thumbnail [90x90]](https://www.dbi-services.com/blog/wp-content/uploads/2024/01/HME_web.jpg)