What if you need absolute control over maintenance and package deployment or if you need to keep them up to date or if
you need to automate the software management and the system provisioning with a high level of security,
SUSE Manager is the right tool you need.
In this blog post I will describe how to install the latest version of SUSE Manager 4.1.
Introduction
SUSE Manager 4.1, based on SLES 15 SP2, is the latest release of a solution that manage large sets of Linux systems,
enables you to deploy, configure, and maintain your systems across physical, virtual, and cloud environments.
It delivers a best-in-class open source infrastructure management and automation solution that lowers costs,
enhances availability and reduces complexity.
Prerequisite
Following are the requirements needed before the installation?
– The SCC (SUSE Customer Credentials)
– The unified installer, you can download it by following this link:
https://download.suse.com/index.jsp?product_id=&search=Search&families=22609&version=68287
– A supported browser for the Web UI.
Personally, I recommend to use Firefox, Chrome can also be used but don’t use Internet Explorer.
– From the server side, a 4 dedicated CPU cores is a minimum. For the Ram, SUSE recommends 32Gb, 64Gb is optimal.
– For the disk space, following volumes on different mount points should be setup:
– SUSE OS, 40Gb
– Postgres database, 60Gb
– Spacewalk repository: here it depends on your subscriptions, for every SUSE product as:
12 SP4, 12 SP15, 15SP1,15SP2, count a minimum of 50Gb but a minimum of 300 Gb for every Red Hat product.
An additional volume of 20Gb where packages are cached should be setup.
– From the network side, a FQDN (Fully Qualified Domain Name) is mandatory. If SUSE Manager can’t resolve it
correctly, it can cause serious problems for some components.
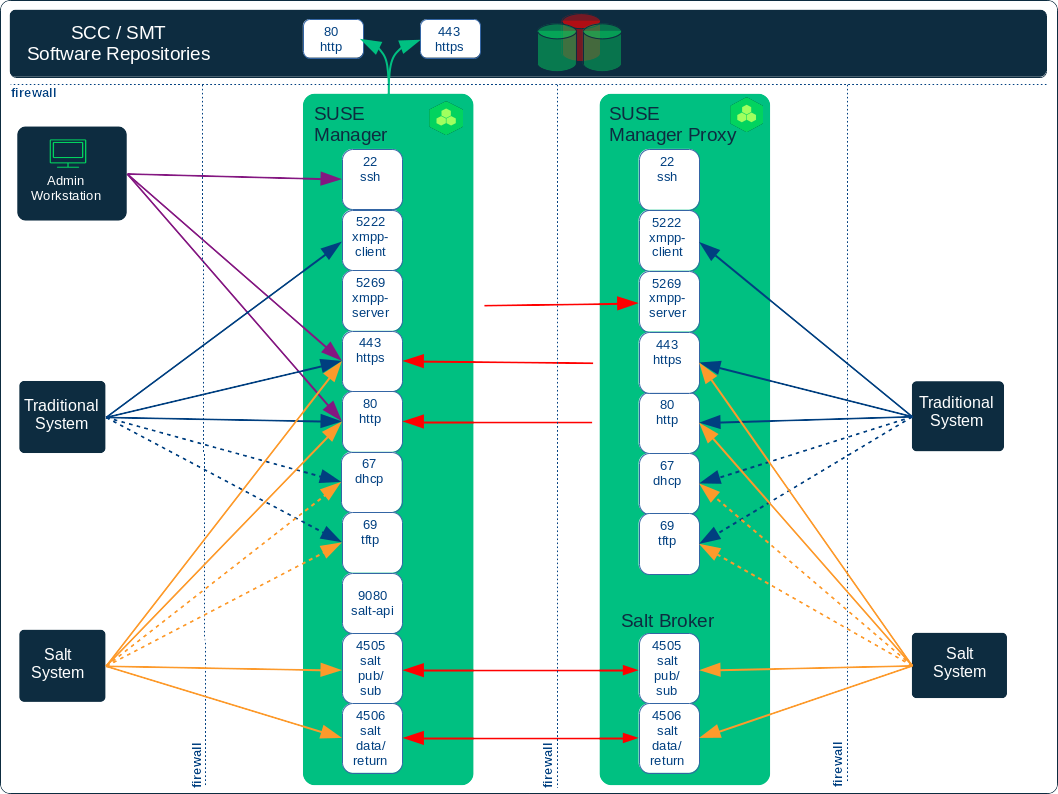
Concerning the list of ports to be open, the picture below shows the main ports used in SUSE Manager.
 Installation
For your installation, you should respect the following order:
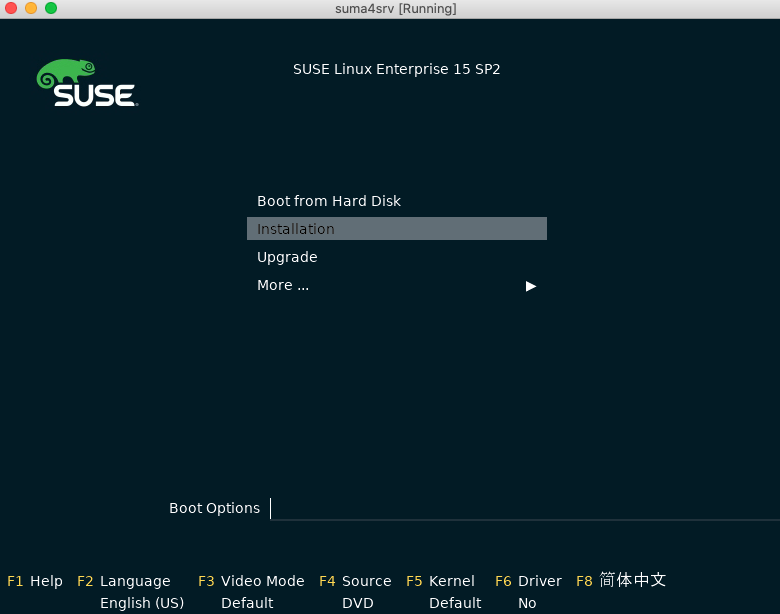
– 1 – Boot the system with the Unified installer (SLE-15-SP2-Full-x86-GM-Media1.iso) et validate the installation in the first window.
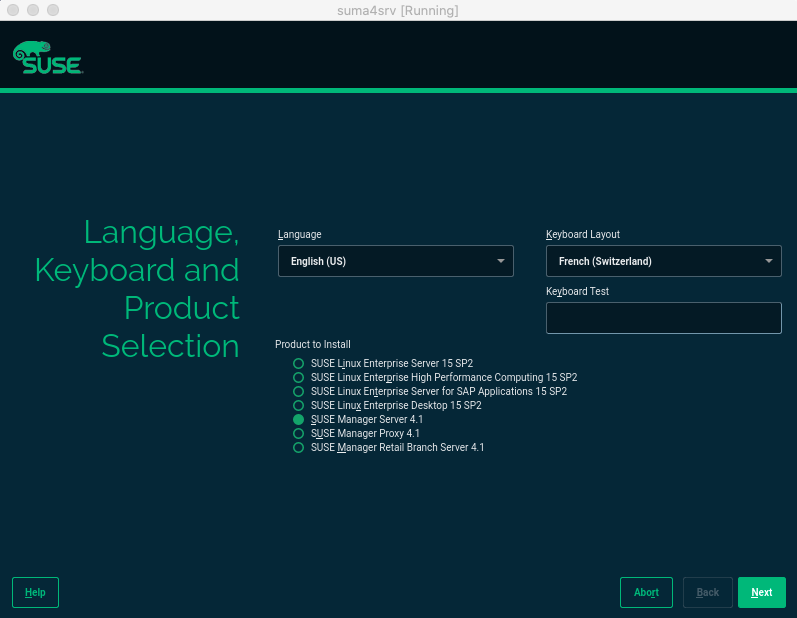
– 2 – Select English (Us) as Language, English (US) for the keyboard layout and “SUSE Manager Server 4.1” as product to install.
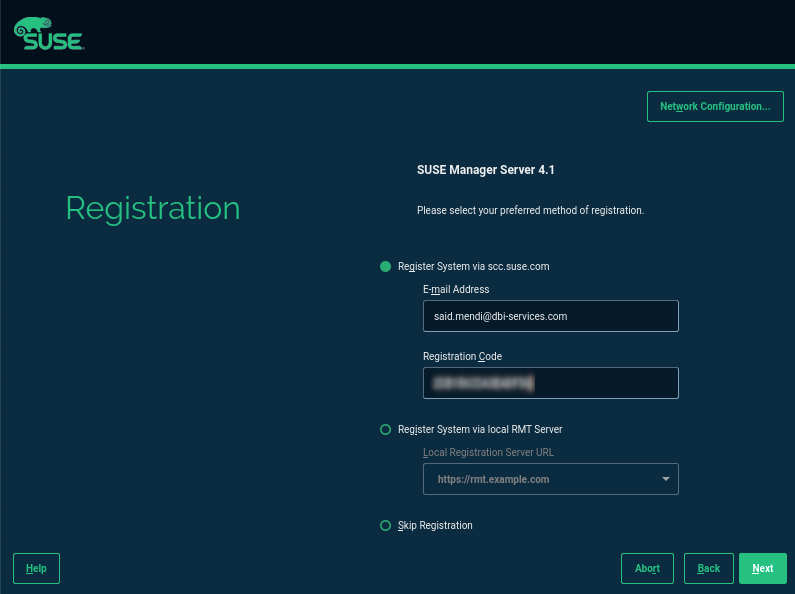
– 3 – Then, in the next window, configure the network and register the System using your Suse Customer Credentials.
– 4 – Skip the “Extension and Module Selection” and the “Add On Product” windows as not needed.
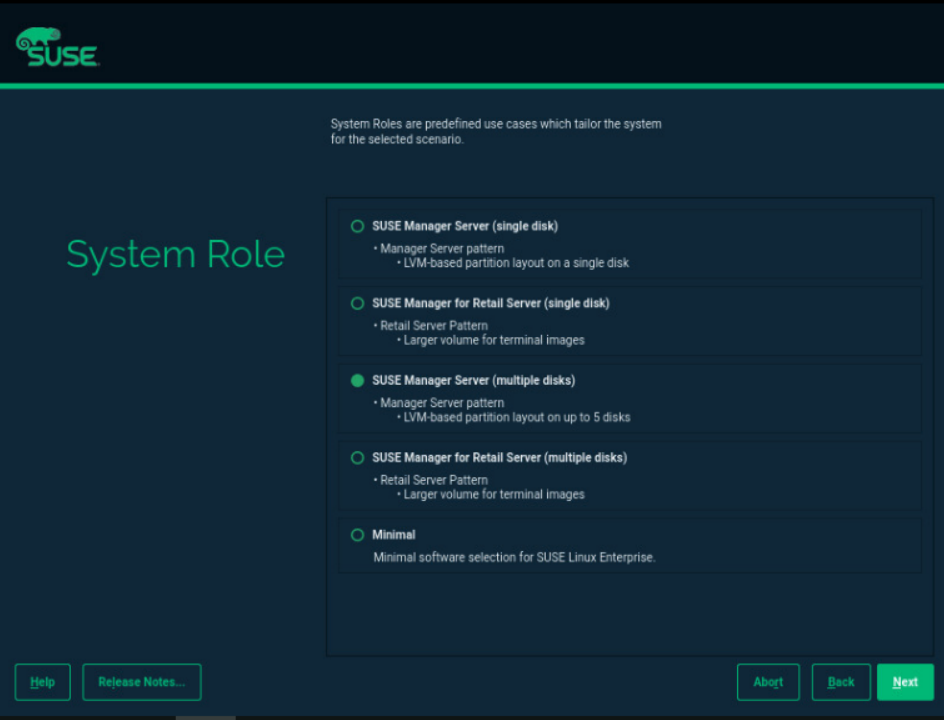
– 5 – On the System role window, select the Suse Manager Server (multiple disks).
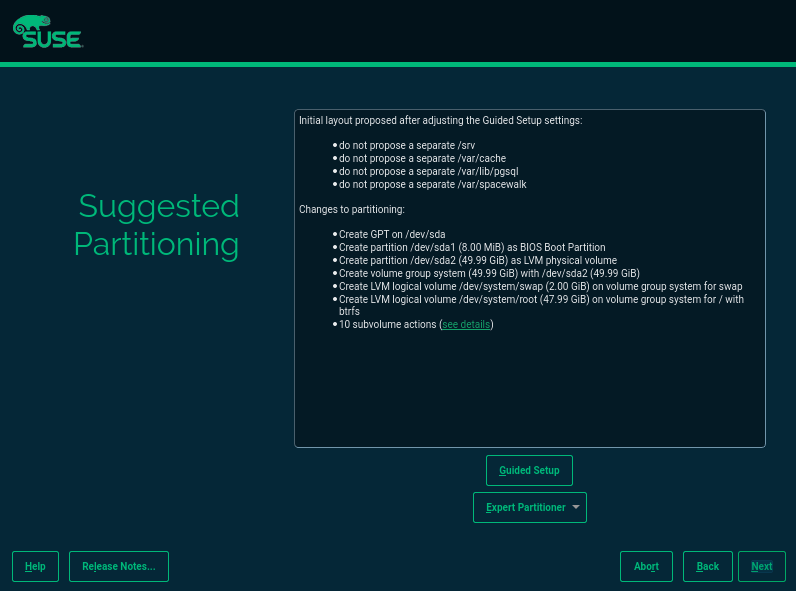
 – 6 – On the suggested Partitioning screen, customize it by clicking on [Expert Partitioner].
One Volume Group with one logical volume for the following mount points:
– /root
– /var/lib/posgresSQL
– /var/lib/Spacewalk
You have to respect scrupulously these mount points otherwise it will cause problems during the installation.
– 7 – Set then the Clock and Time zone but also the NTP Server by clicking on the “other settings” option to configure it.
– 8 – Create the Admin and root user.
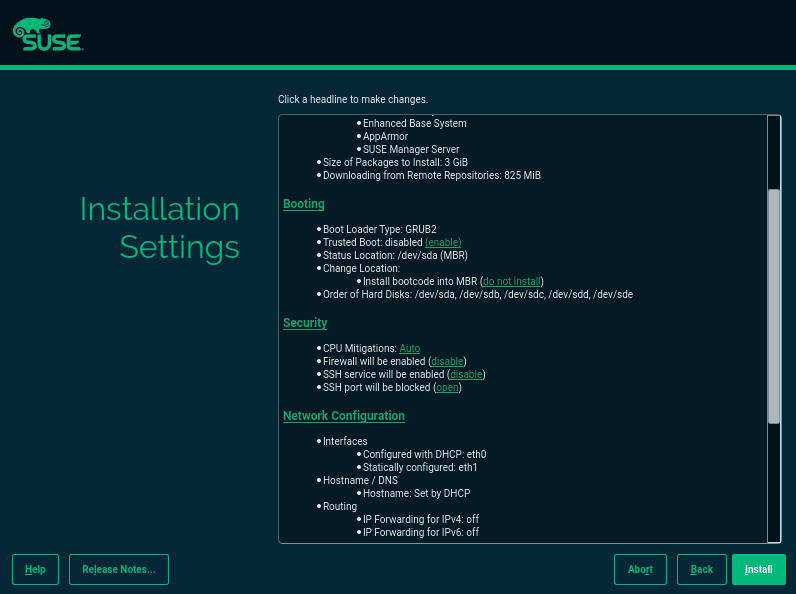
– 9 – When reviewing the Installation settings, you can, if you want, enable the Graphical Desktop Environment. If everything is Ok, click on [Install]
When the installation is over, you can check all installed modules by using the following command:
suma4srv:~ # SUSEConnect --status-text

Installed Products:

------------------------------------------

SUSE Manager Server 4.1

(SUSE-Manager-Server/4.1/x86_64)

Registered

Subscription:

Regcode: XXXXXXXXXXXXXX

Starts at: 2020-12-21 00:00:00 UTC

Expires at: 2021-04-21 00:00:00 UTC

Status: ACTIVE

Type: evaluation

------------------------------------------

Basesystem Module

(sle-module-basesystem/15.2/x86_64)

Registered

------------------------------------------

Python 2 Module

(sle-module-python2/15.2/x86_64)

Registered

------------------------------------------

Server Applications Module

(sle-module-server-applications/15.2/x86_64)

Registered

------------------------------------------

Web and Scripting Module

(sle-module-web-scripting/15.2/x86_64)

Registered

------------------------------------------

SUSE Manager Server 4.1 Module

(sle-module-suse-manager-server/4.1/x86_64)
Conclusion
This was the first blog post of a serie and in a second blog I will detail the following steps needed to make your SUSE Manager 4.1 environment ready to use.
![Thumbnail [60x60]](https://www.dbi-services.com/blog/wp-content/uploads/2022/08/SME_web-min-scaled.jpg)
![Thumbnail [90x90]](https://www.dbi-services.com/blog/wp-content/uploads/2022/08/DWE_web-min-scaled.jpg)